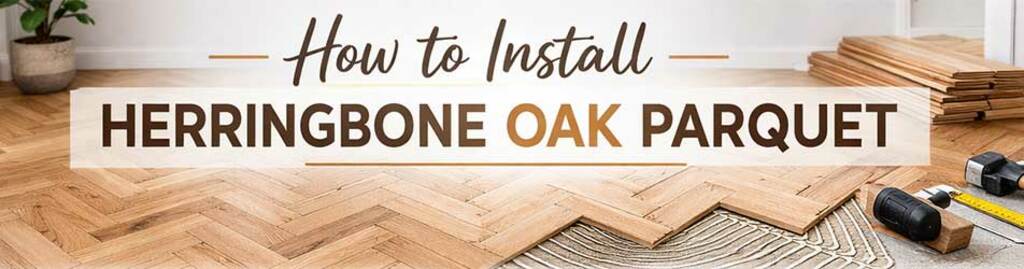
How to Install Herringbone Oak Parquet
 If you are looking to enhance your home’s interior, learning how to install herringbone oak parquet is a worthwhile endeavour. This classic flooring style adds elegance and character to any space, making it popular among homeowners and designers alike. In this article, we will provide you with a comprehensive guide to installing herringbone oak parquet, ensuring that you achieve a professional finish.
Preparation Before Installation
Proper preparation is crucial when considering how to install herringbone oak parquet. Failing to prepare adequately can lead to complications during the installation process and affect the overall quality of the flooring. Follow these steps to ensure a smooth installation:
- Choose Your Parquet: Select high-quality herringbone oak parquet to ensure durability and aesthetic appeal. Consider the thickness of the planks, as standard thickness ranges from 14mm to 22mm.
- Room Conditions: Ensure that the room where you plan to install the flooring is dry, clean, and at a temperature between 18°C and 24°C. Allow the parquet to acclimatise in the room for at least 48 hours before installation.
- Subfloor Preparation: The subfloor must be level, clean, and dry. A concrete or wooden subfloor can be used, but if it is uneven, use a levelling compound to correct it. Check for moisture with a damp metre to avoid future issues.
- Gather Your Tools: Required tools include a tape measure, straight edge, chalk line, saw, adhesive or flooring nails, spacers, and a rubber mallet. Having everything on hand will make the installation process smoother.
Installation Process
Now that you have prepared your space and materials, you can begin the actual installation of your herringbone oak parquet. Follow these detailed steps for a successful installation:
1. Planning the Layout
Before you start laying your parquet, it is essential to plan the layout. Use a chalk line to mark the centre of the room. This will help you maintain a symmetrical pattern. From the centre, measure outwards to determine how the herringbone pattern will fit, ensuring that you will not have small, awkward pieces at the edges.
2. Laying the First Row
Begin laying the first row of parquet on the chalk line. Use spacers to maintain a consistent expansion gap of about 10mm between the planks and the wall. Apply an appropriate adhesive to the underside of the first plank or use flooring nails, depending on your chosen installation method.
3. Continuing the Pattern
Once the first row is laid, continue with the second row by placing the first plank at a 90-degree angle to the first row. Ensure that the ends of the planks in adjacent rows do not align, as this will provide greater stability and a more appealing design. Use a rubber mallet to gently tap the planks into place, ensuring a snug fit.
4. Cutting the Planks
As you reach the edges of the room, you will need to cut the planks to fit. Use a saw to make precise cuts, and remember to measure carefully to ensure you have the right length. Always wear safety goggles when using power tools.
5. Completing the Installation
Continue laying herringbone oak parquet in this manner until the entire area is covered. Once you reach the final row, you may need to adjust the widths of the last few planks to fit snugly against the wall. After all the planks are installed, remove spacers and allow the adhesive to cure as per the manufacturer's instructions, typically 24 to 48 hours.
Finishing Touches
Once the adhesive has set, you can apply finishing touches to your new flooring. Consider the following steps:
- Trims and Mouldings: Install skirting boards or trim around the edges to cover the expansion gaps and give a polished look. Choose a style that complements your oak parquet.
- Sealing: Depending on the finish of your oak parquet, you may want to apply a sealant to protect the wood and enhance its appearance. A polyurethane finish can provide a durable, water-resistant layer.
- Cleaning: After installation, clean the floor with a suitable wood floor cleaner to remove any adhesive residue or dust.
Maintenance of Herringbone Oak Parquet
To keep your herringbone oak parquet looking its best, regular maintenance is essential. Clean the floor weekly with a soft broom or vacuum designed for hardwood floors. Avoid using excessive water, as it can damage the wood. For deeper cleaning, use a damp mop with a wood floor cleaner.
Additionally, consider applying a maintenance coat of finish every few years to protect the wood and maintain its lustre. If you notice scratches or wear, you can sand and refinish the affected areas to restore the original beauty of the parquet.
Conclusion
Learning how to install herringbone oak parquet can significantly enhance your home’s aesthetic appeal and value. By following the steps outlined in this guide, you can achieve a professional-looking floor that will last for years. With proper installation and maintenance, your herringbone parquet will be a stunning feature in your home, adding warmth and style to any room.