Master the Art of Installing Parquet Flooring in Your Home
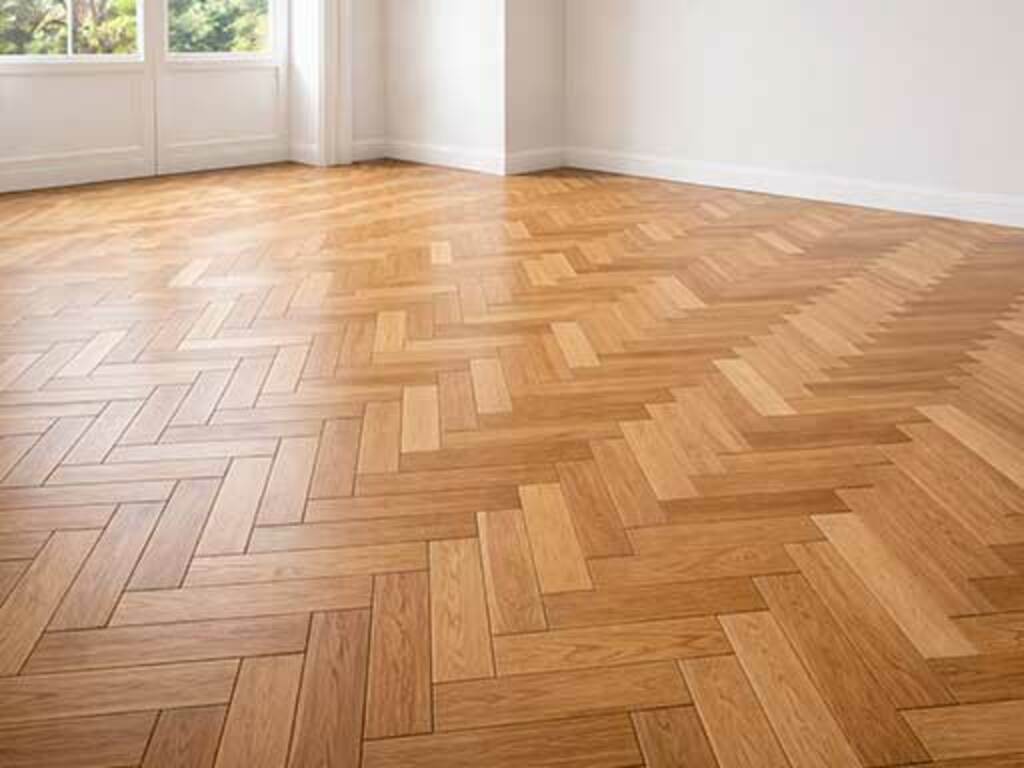
Parquet flooring brings timeless elegance and warmth to any home. Before learning how to lay parquet flooring, it's essential to understand what you're working with. Parquet consists of small wooden blocks arranged in geometric patterns, creating visually striking floors that range from simple checkerboards to intricate herringbone designs. Unlike laminate or vinyl alternatives, authentic parquet is a genuine wood product that develops character over time.
The beauty of parquet lies in its versatility. Whether you're renovating a Victorian terrace in London or updating a modern property in Manchester, parquet adapts beautifully to various interior styles. Understanding the different parquet types—solid wood blocks, engineered parquet, and pre-finished options—helps you choose the right material for your specific installation project and room conditions.
Preparation and Planning Your Installation
Assessing Your Subfloor
A successful parquet installation begins with proper subfloor preparation. Inspect your existing floor carefully for any signs of damage, dampness, or unevenness. Parquet flooring requires a stable, level surface; any imperfections will telegraph through to the finished floor. Use a moisture meter to check your subfloor's moisture content, particularly important in homes where humidity fluctuates seasonally.
Concrete subfloors need a damp-proof membrane if moisture readings exceed 75% relative humidity. Timber subfloors should be structurally sound with no movement or bounce. If your subfloor shows significant defects, consider laying self-levelling compound or new plywood underlayment. This upfront investment prevents costly repairs and ensures your parquet installation lasts decades.
Essential Tools and Materials Checklist
- Parquet blocks (order 10% extra for wastage and future repairs)
- Adhesive specifically formulated for parquet (moisture-resistant varieties recommended for climates)
- Notched trowel (size depends on block dimensions)
- Spacers to maintain consistent gaps between blocks
- Straight edge and spirit level for checking levelness
- Hand saw, or power saw, for cutting-edge pieces
- Rubber mallet for tapping blocks into position
- Wood filler matching your parquet colour
- Sanding equipment for finishing (orbital sander with fine-grit paper)
- Moisture meter and damp-proof membrane
- Safety equipment: dust mask, eye protection, and work gloves
- Primer and sealant suitable for wood floors
Gathering these materials before starting ensures you won't waste time on multiple shopping trips. Specialist flooring suppliers stock everything you'll need, often providing expert advice on product compatibility.
Step-by-Step Installation Process
Planning Your Layout Pattern
The pattern you choose significantly affects both the aesthetic outcome and installation complexity. Popular choices include herringbone patterns, basketweave designs, and simple straight layouts. Begin by finding the room's centre point and snap chalk lines to create a guide. For herringbone patterns, your blocks need precise angles and careful alignment from the centerline outward.
Dry-lay several rows to establish your pattern before applying any adhesive. This crucial step reveals potential issues with block fit, pattern alignment, and edge piece requirements. Adjust your starting point if necessary to minimise cutting at room edges. A well-planned layout looks professional and reduces material wastage significantly.
Applying Adhesive and Setting Blocks
Using a notched trowel held at 45 degrees, apply parquet adhesive to your prepared subfloor in small sections—approximately one square meter at a time. Work systematically across the room to maintain consistent coverage without allowing the adhesive to dry prematurely. Press each block firmly into the adhesive, using your rubber mallet for stubborn pieces.
Maintain consistent spacing between blocks using spacers; typically, 2-3mm gaps accommodate natural wood movement. Check block alignment frequently with your spirit level, ensuring no rocking or high spots. Wipe excess adhesive immediately with a damp cloth—it becomes extremely difficult to remove once set.
Cutting and Fitting Edge Pieces
Edge pieces require careful measurement and cutting. Measure the remaining wall distance accurately, accounting for your spacer gaps. Mark your parquet blocks with a pencil, then cut using a hand saw for precision or a power saw for speed. Always cut from the back face to minimise splintering on visible surfaces.
Test-fit cut pieces before adhesive application. Sometimes minor adjustments prevent gaps or misalignment at critical junctions. Doorways require particular attention—cut pieces should finish cleanly beneath door frames without compromising door operation or requiring excessive threshold adjustments.
Finishing and Protection
Sanding and Surface Preparation
Allow adhesive to cure fully—typically 48 hours, depending on product specifications and ambient humidity. Once cured, sand your entire floor using an orbital sander with progressively finer grit papers: start with 80-grit abrasive, progress to 120-grit abrasive, then finish with 150-grit abrasive for smoothness. Sand with the grain direction where possible, though parquet's varied grain directions require careful technique.
Vacuum thoroughly between each sanding stage, removing all dust before proceeding. Dust prevents adhesives and sealers from bonding properly. Consider hiring professional sanding equipment if your parquet area exceeds 50 square meters—the results justify the expense for larger projects.
Sealing and Protection Measures
- Apply wood primer suitable for parquet flooring, following the manufacturer's instructions carefully
- Choose either polyurethane sealant for maximum durability or wax finish for natural appearance
- Apply sealant in thin, even coats using a roller or brush, allowing proper drying between applications
- Use water-based sealants for faster drying and lower VOC emissions in your home
- Apply a minimum of two coats for adequate protection in high-traffic homes
- Allow full curing (typically 7 days) before heavy furniture placement or foot traffic
Proper sealing protects your parquet investment from moisture, staining, and wear. Different sealant types offer varying aesthetics—matt finishes suit traditional interiors while gloss varieties enhance modern spaces. Test sealant on a hidden sample block before committing to your entire floor.
Aftercare and Maintenance
Maintaining your newly installed parquet ensures longevity and sustained beauty. Implement preventative measures immediately: place felt pads beneath furniture legs, use rugs in high-traffic areas, and manage humidity levels between 40-60%. Homes experience significant seasonal humidity fluctuations; controlling indoor climate reduces cupping and movement.
Clean regularly using slightly dampened mops rather than wet cleaning, which damages wood. Avoid harsh chemicals, use specialist wood floor cleaners. Address spills immediately to prevent water damage. Professional deep cleaning every 2-3 years maintains your floor's appearance and extends its lifespan considerably.
Your newly laid parquet flooring represents a substantial investment in your home's beauty and value. Following these comprehensive guidelines ensures professional results that rival specialist installation while giving you satisfaction from completing this rewarding project yourself.